Burn ERC-20 Token
It is possible to proceed an ERC-20 Token burning test using Remix.
There are two ways to burn ERC-20 Token.
Sending to a Dead Wallet Address
Burning by the Administrator
All examples are based on WEMIX3.0 Testnet.
1 . Sending to a Dead Wallet Address
First, let's proceed with the burning process by sending the ERC-20 Token to the Dead Wallet address.
Write ERC-20 Contract and Check ERC-20 Token should proceed first.
Sending to a Dead Wallet Address
Once adding the Token is completed after deploying ERC-20 Contract, select the added ERC-20 Token and proceed with 'Send' to the Dead Wallet address.
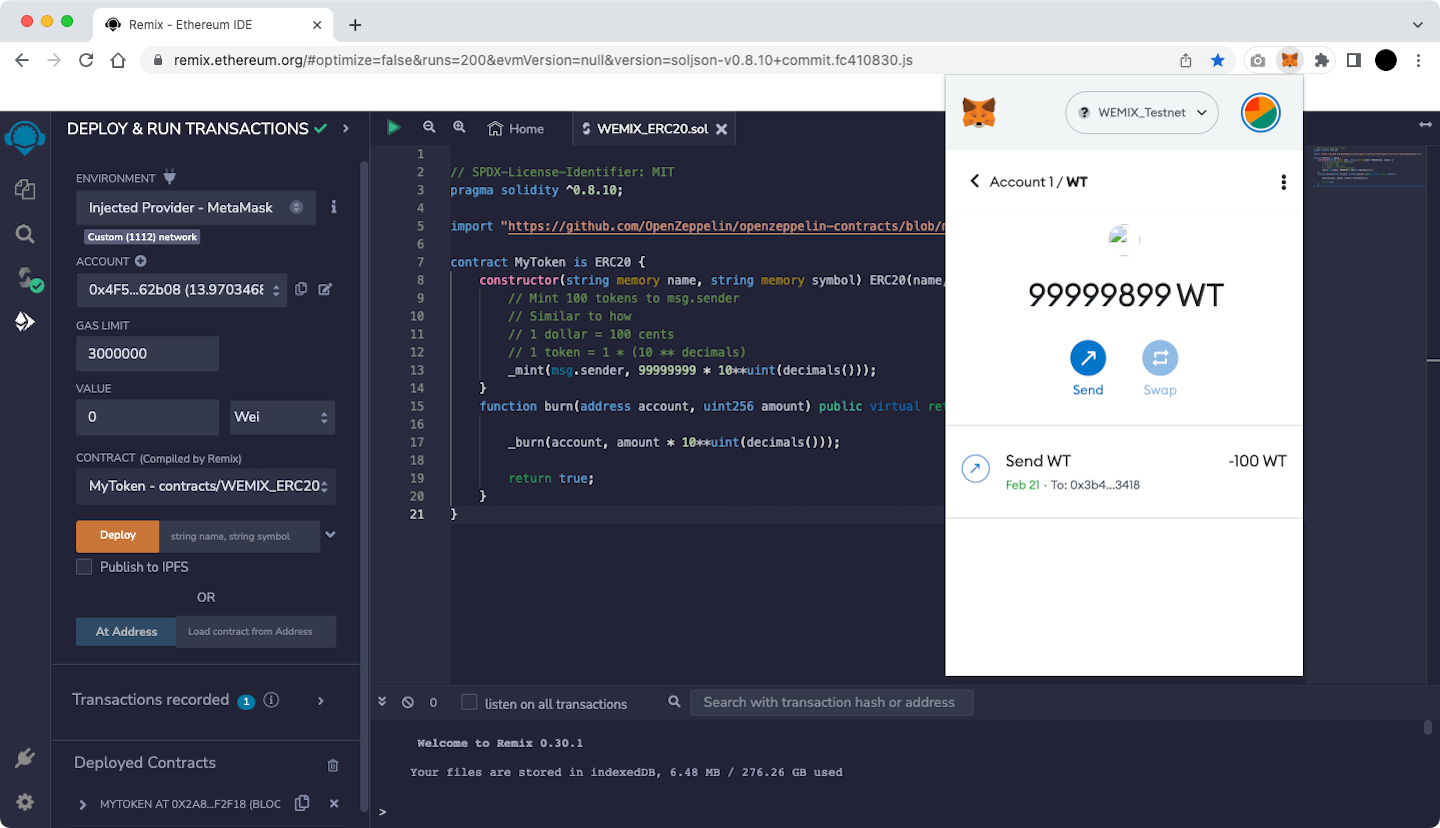
Select 'Send' in the figure above. After then enter the Dead Wallet address and the quantity of Token you want to burn.
Dead Wallet Address
0x000000000000000000000000000000000000dEaD
The figure below is the example of buring 10,000,000 WT Tokens to the Dead Wallet address.
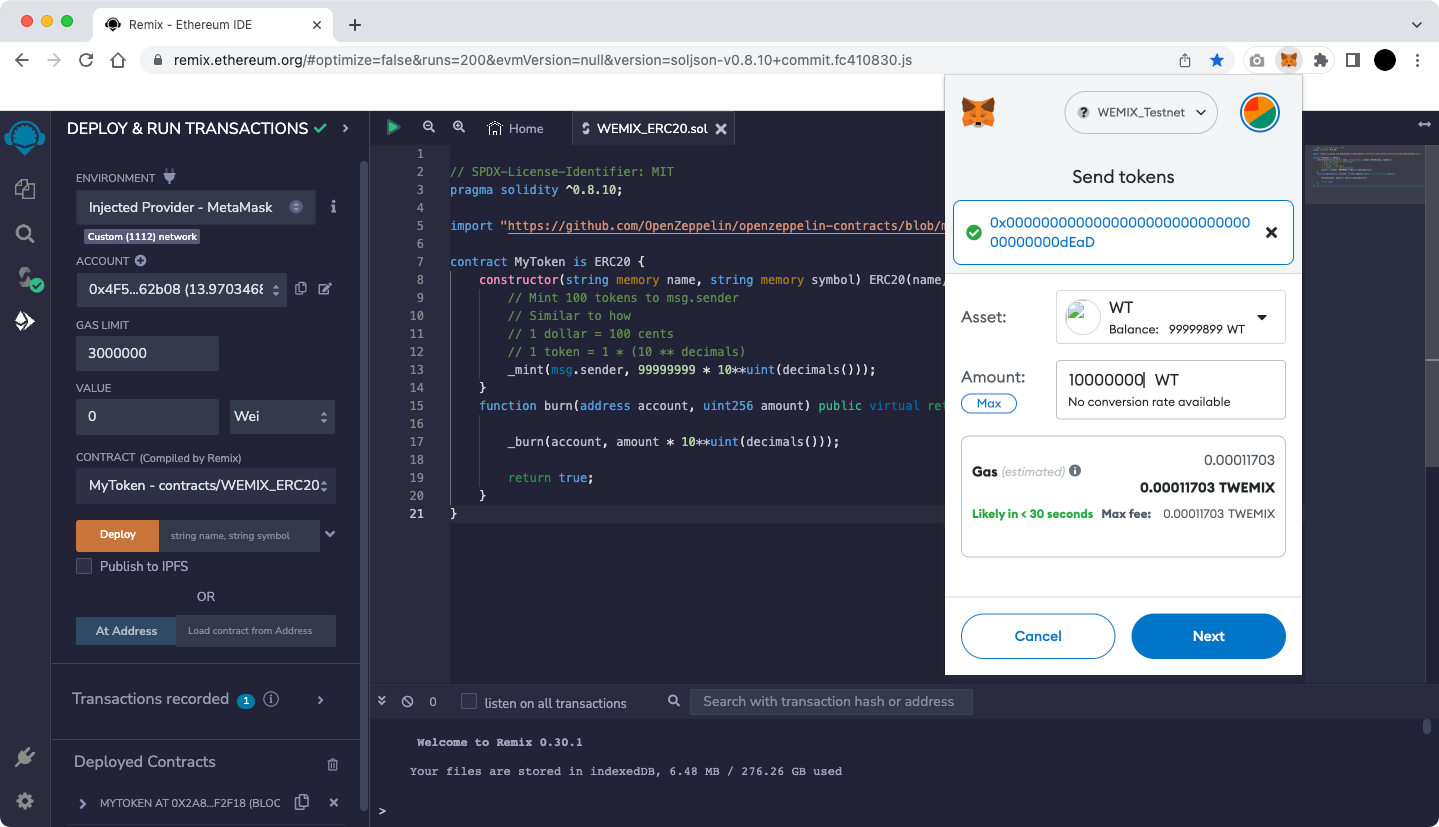
When you select 'Next' after entering Token amount that you want to burn, a MetaMask pop-up appears and a screen showing the default 'Gas Fee' based on Ethereum appears.
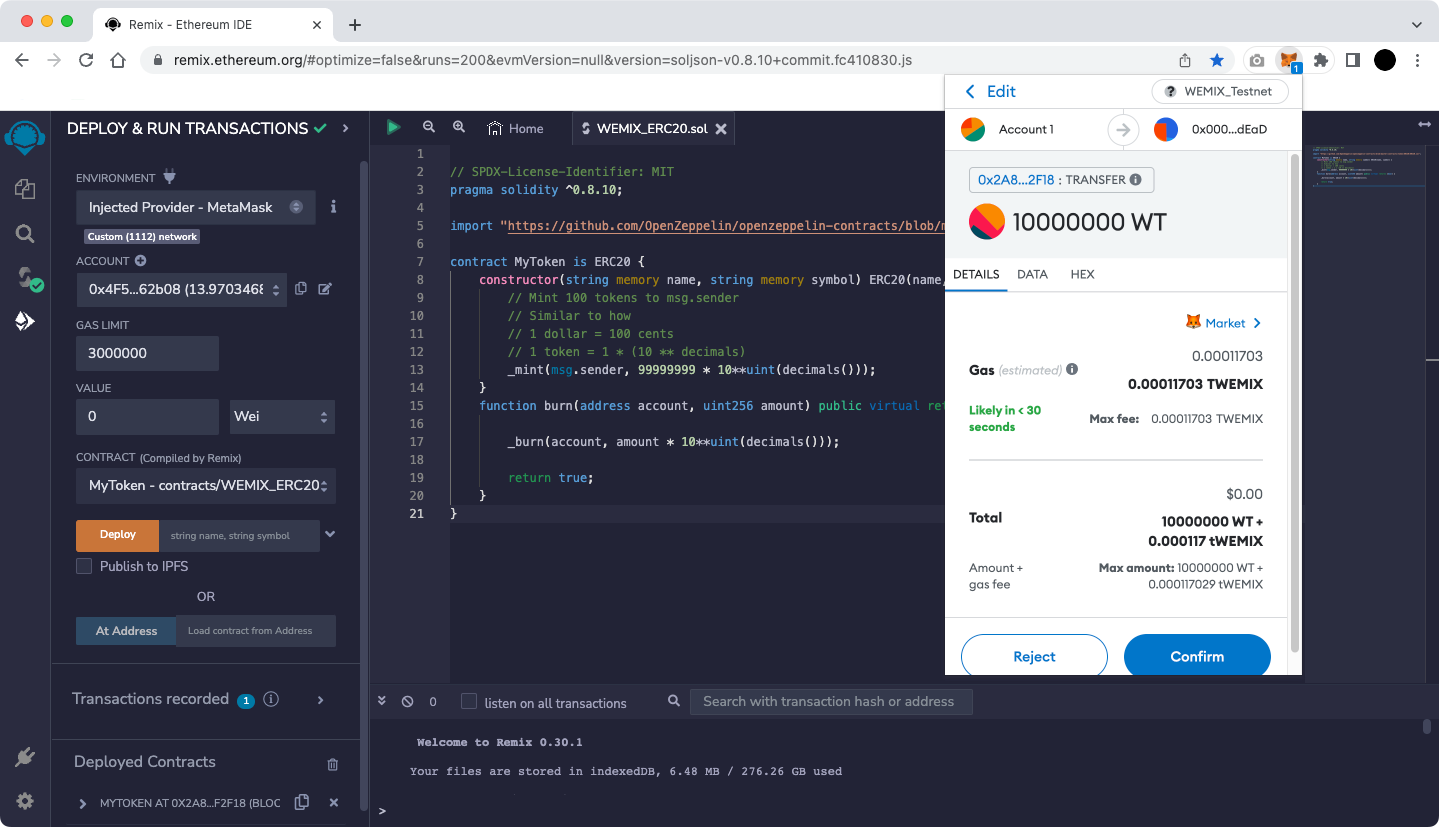
WEMIX has a different fee policy than Ethereum, so press the 'Site suggested' button to change t the Gas Fee.
Selecting 'Advanced' on the screen below allows the user to set 'Max priority fee (GWEI)' and 'Max fee (GWEI)' manually.
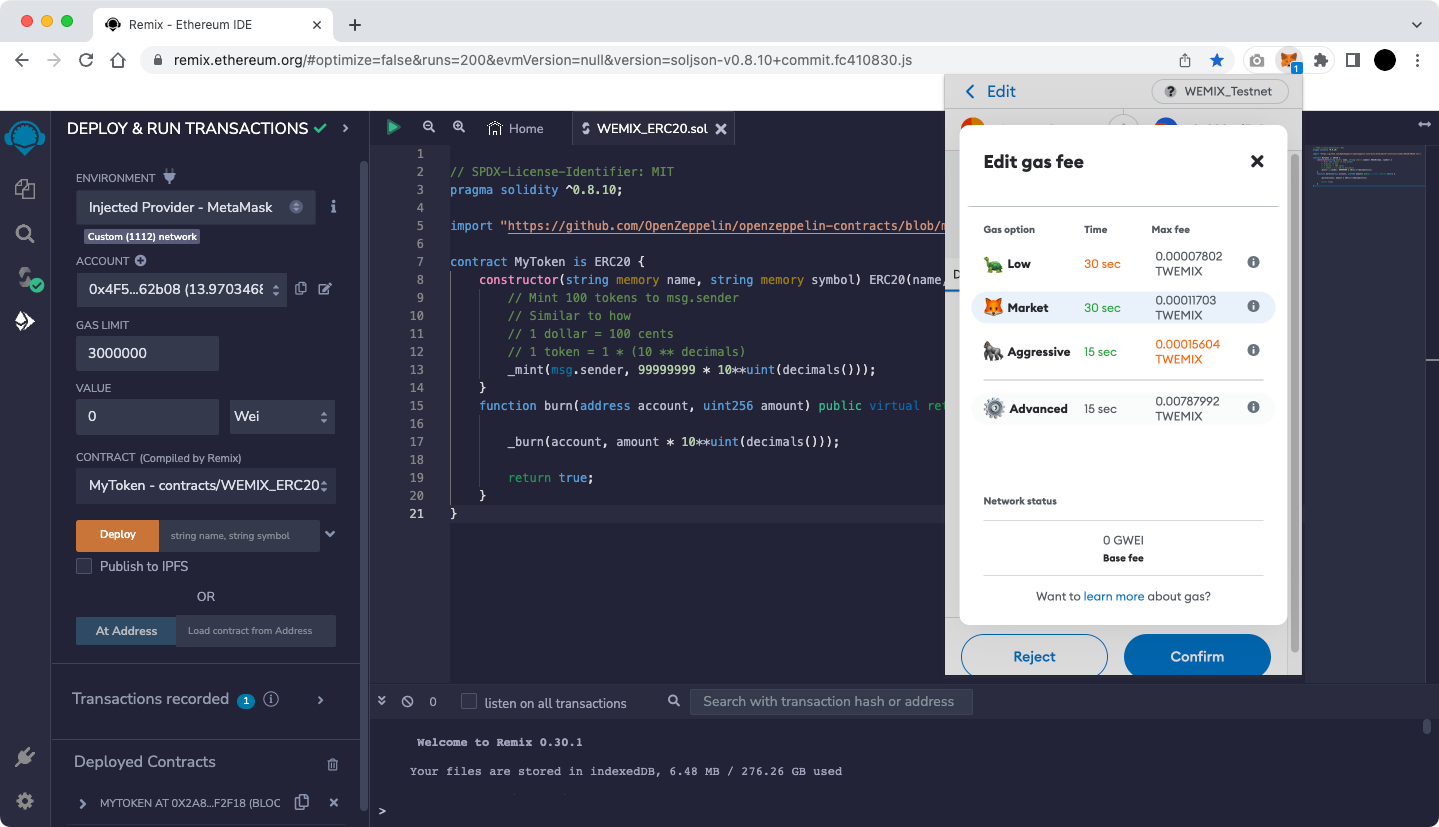
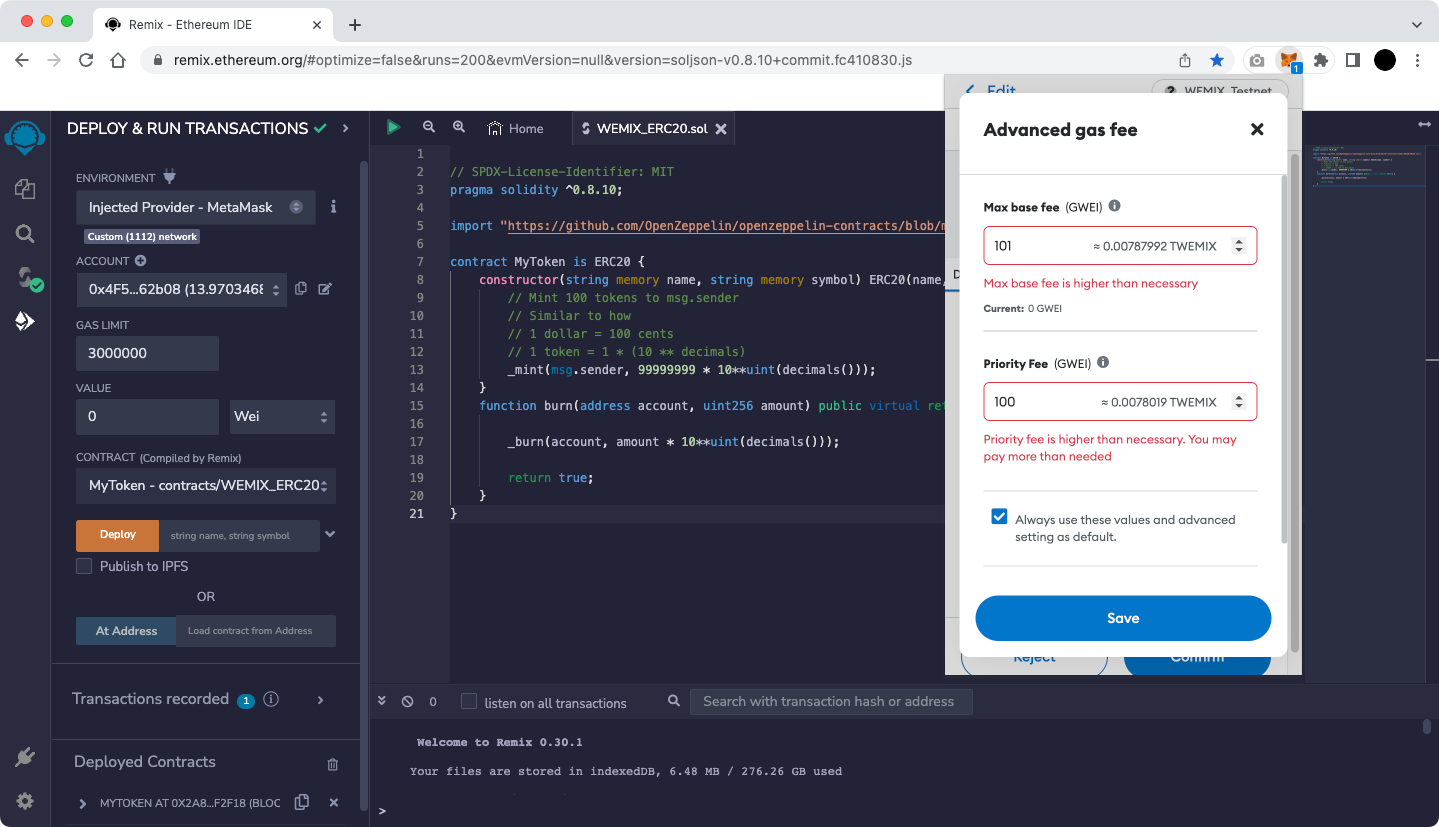
Currently, WEMIX is using a fixed 'Max priority fee (GWEI)' and the value is 100.
Max fee is a user-defined value and the minimum value is MaxPriorityFee+BASE_FEE.
BASE_FEE in WEMIX is variable according to EIP-1559. Therefore, for a transaction to be successfully created, it is recommended to set it as follows.
Max base fee (GWEI) = 101
Max priority fee (GWEI) = 100
Complete the Fee setup in the figure above and select 'Save' to be ready for burning Token as shown below.
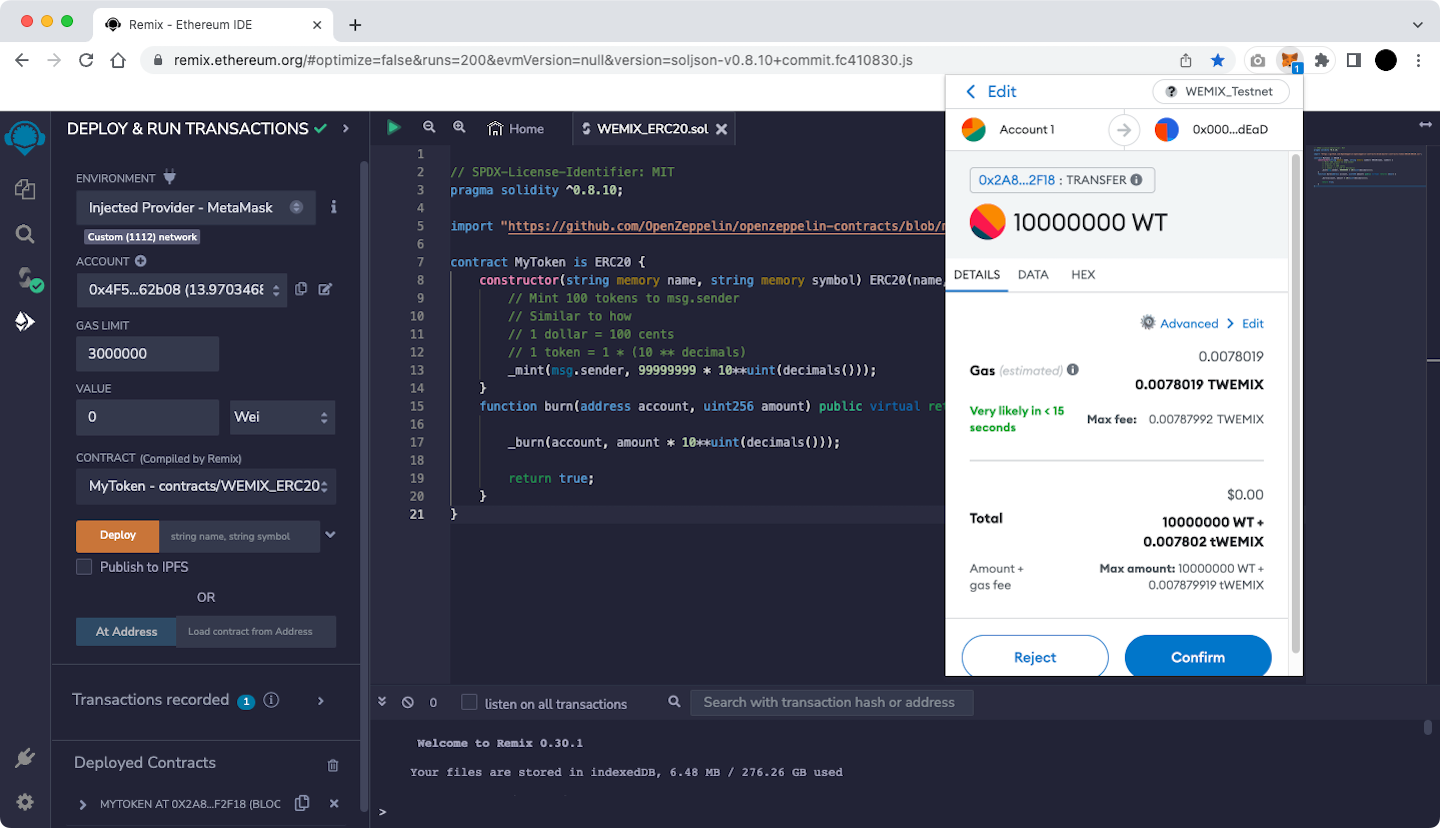
Select 'Confirm' in the figure above to burn ERC-20 Token.
If a green check mark appears at the bottom of the Remix screen as shown below, the burning ERC-20 Token is completed normally.
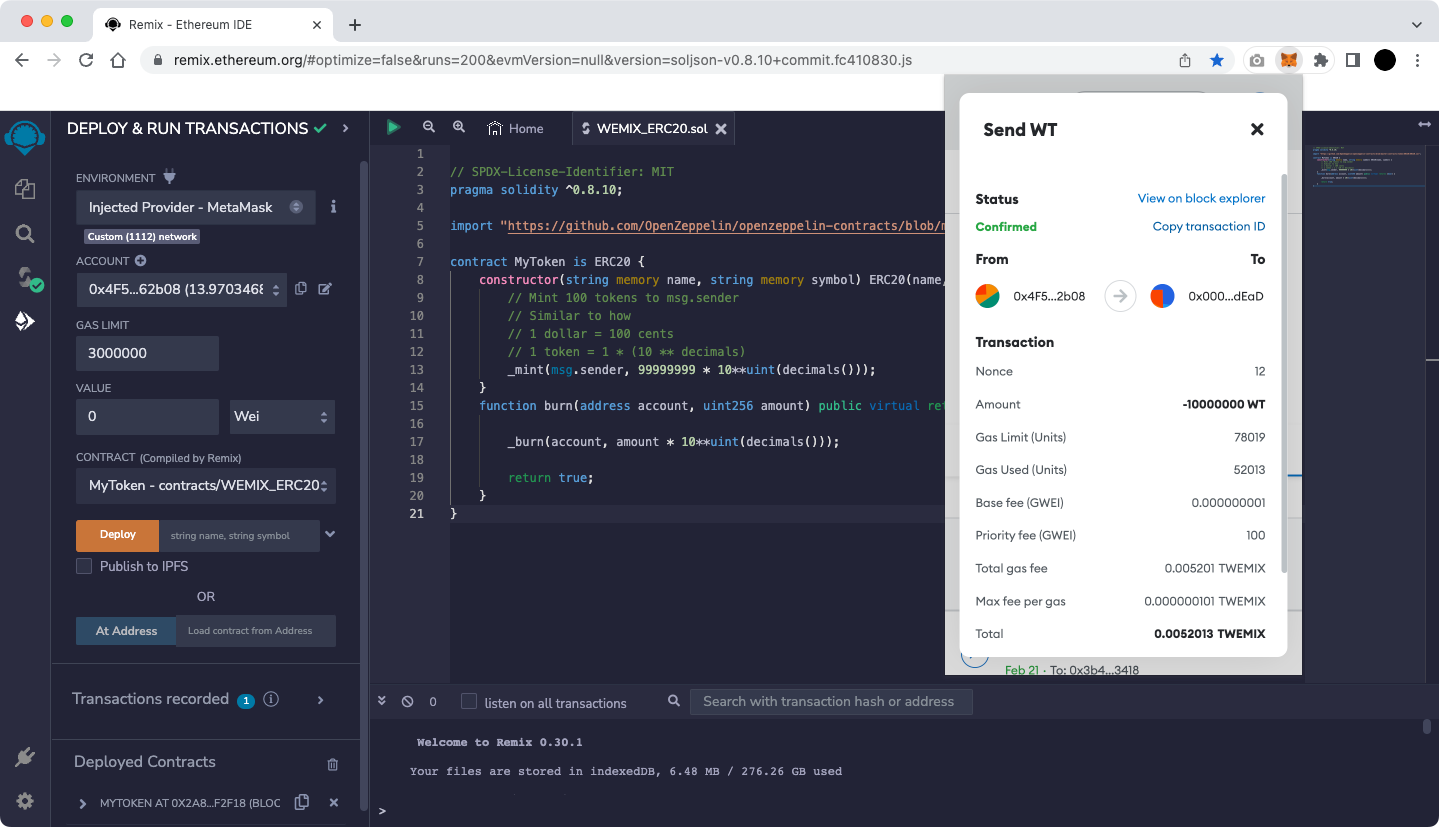
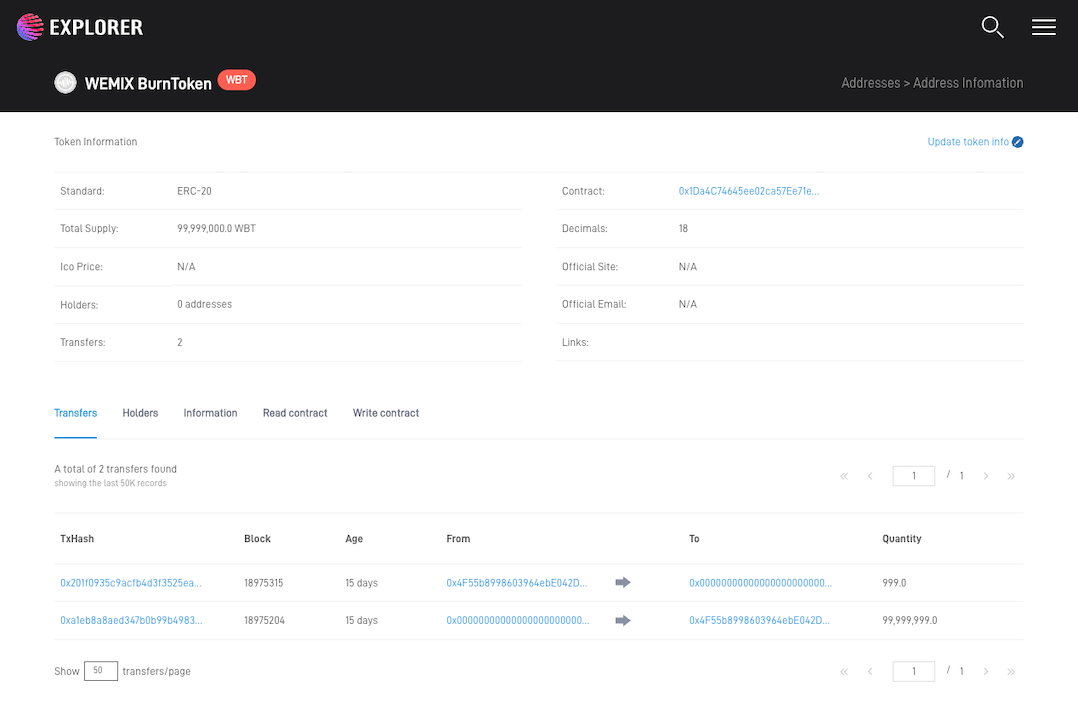
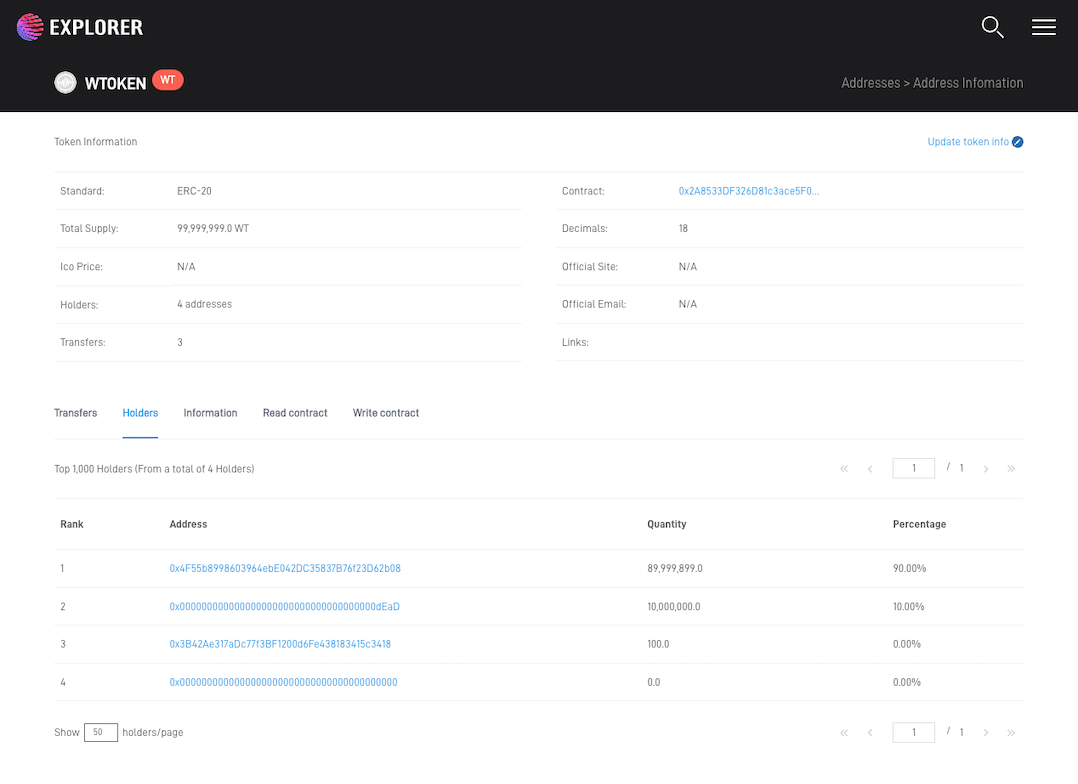
If you select the ERC-20 Token that you created on the Token List page in Testnet Explorer., you can confirm that the ERC-20 Token has been burned normally.
2 . Burning by the Administrator
Second, we will proceed with the burning ERC-20 Token process by the Administrator in Remix.
Write ERC-20 Contract and Check ERC-20 Token should proceed first.
Burning ERC-20 Token directly
You can see the contents of the deployed contract in the "Deployed Contracts" section of the screen where the ERC-20 Contract was deployed.
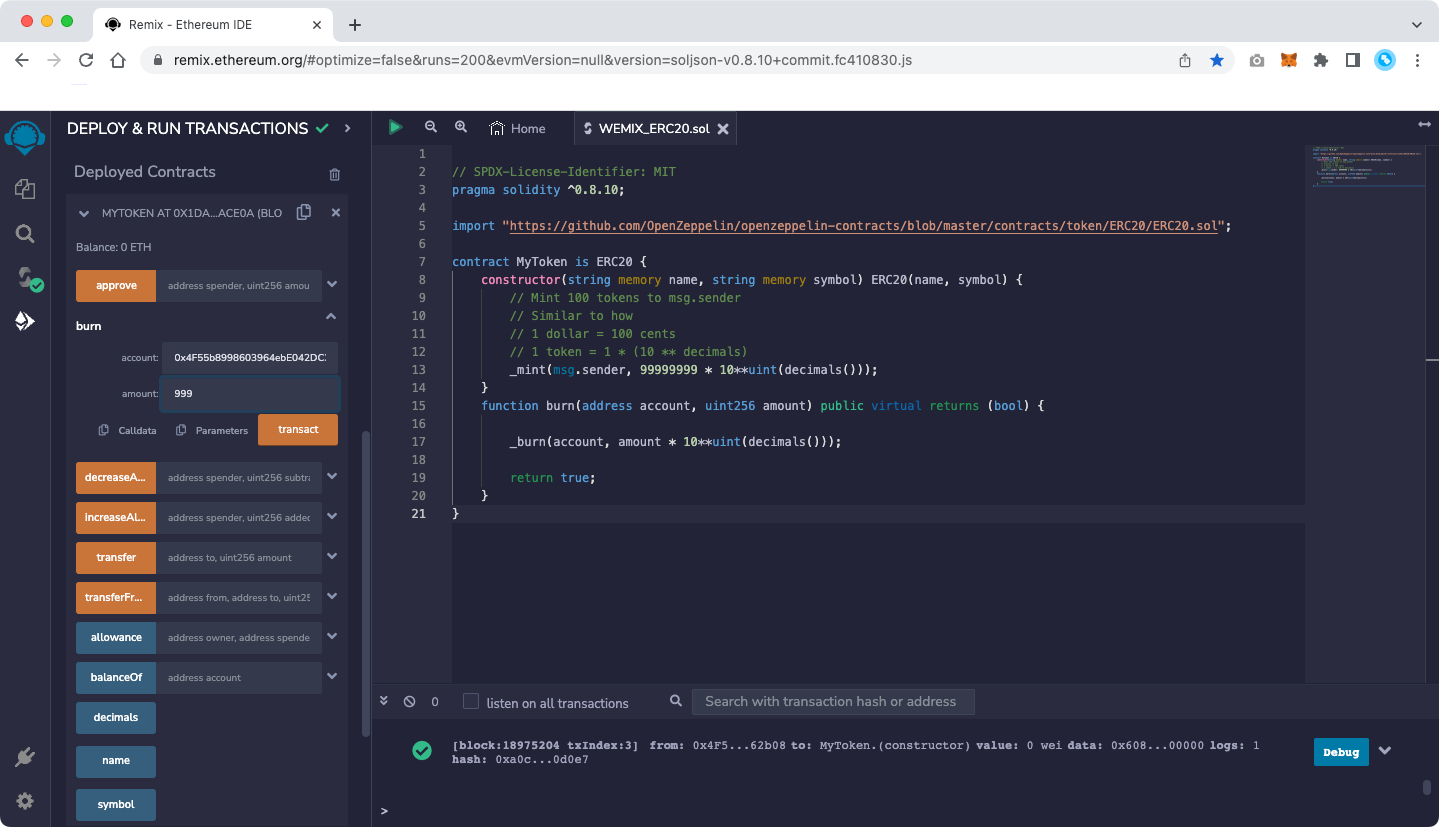
Select 'burn' to enter account and amount. In account, enter the deployed address, and in account, enter the quantity you want to burn.
The figure below shows an example of burning 999 WBT Token after deploying WEMIX BurnToken Contract.
When 'transact' is selected after entering the account and amount, a MetaMask pop-up appears as shown below, and a screen showing the default "Gas Fee" based on Ethereum appears.
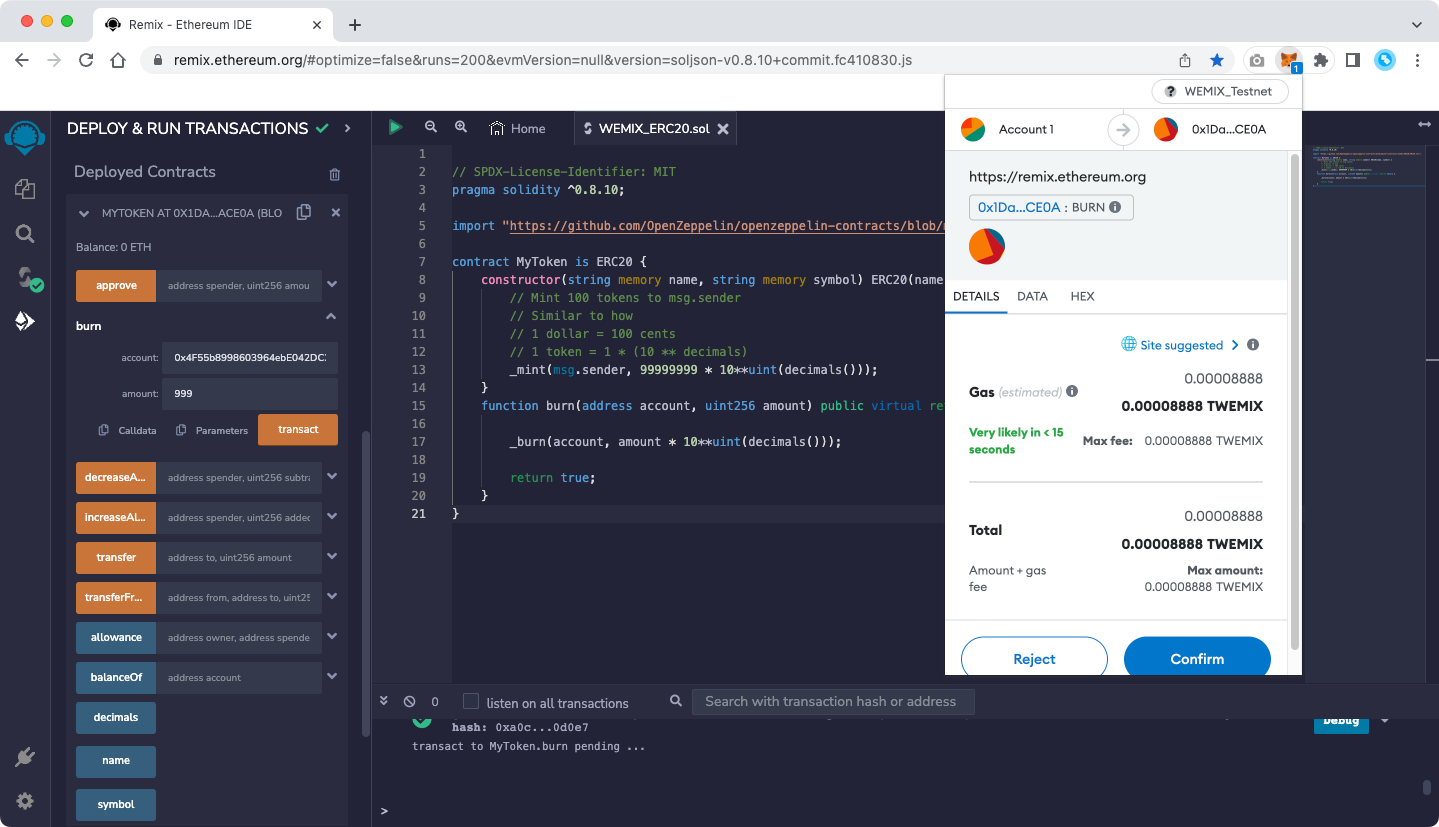
WEMIX has a different fee policy than Ethereum, so press the 'Site suggested' button to change t the Gas Fee.
Selecting 'Advanced' on the screen below allows the user to set 'Max priority fee (GWEI)' and 'Max fee (GWEI)' manually.
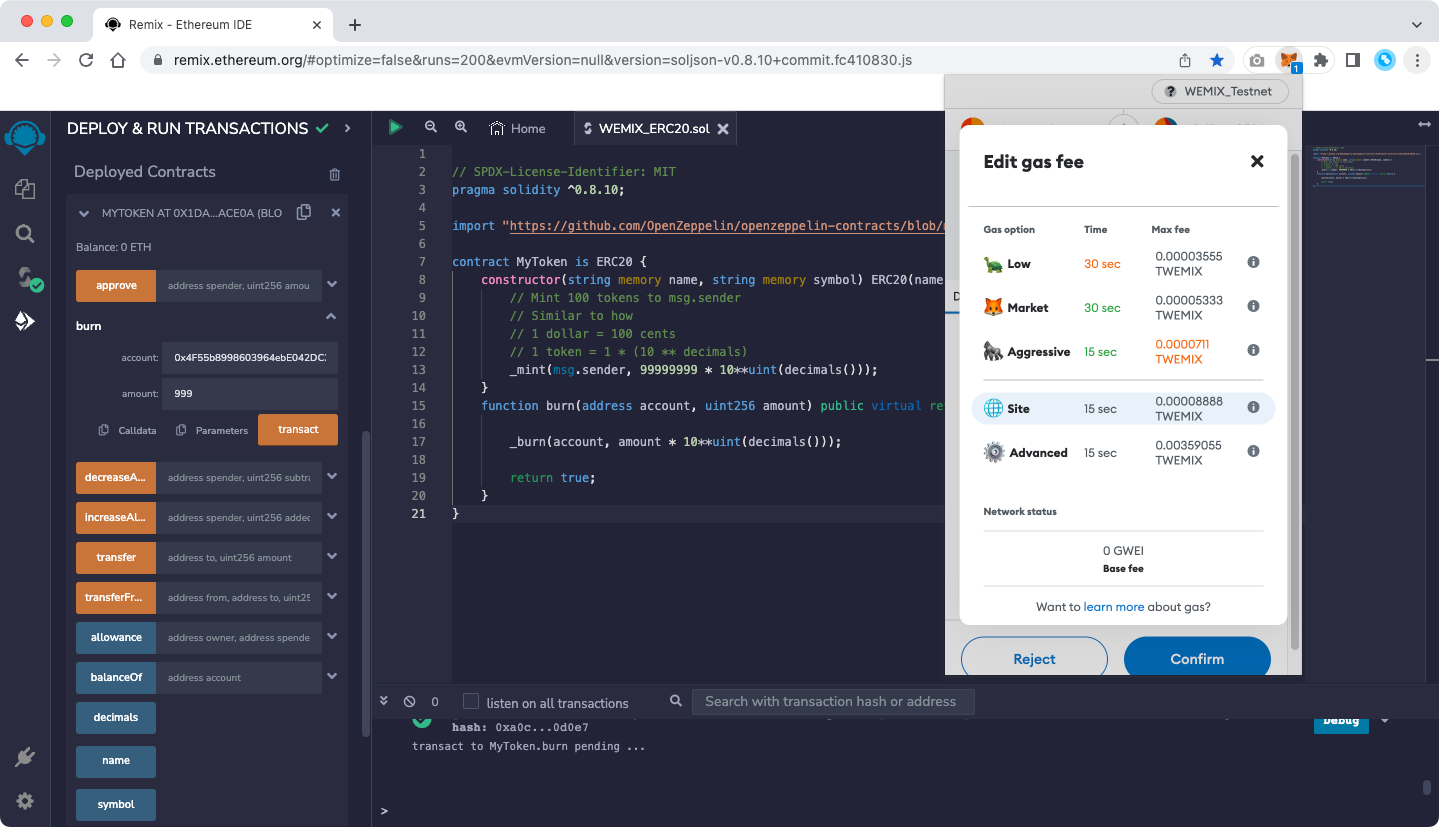
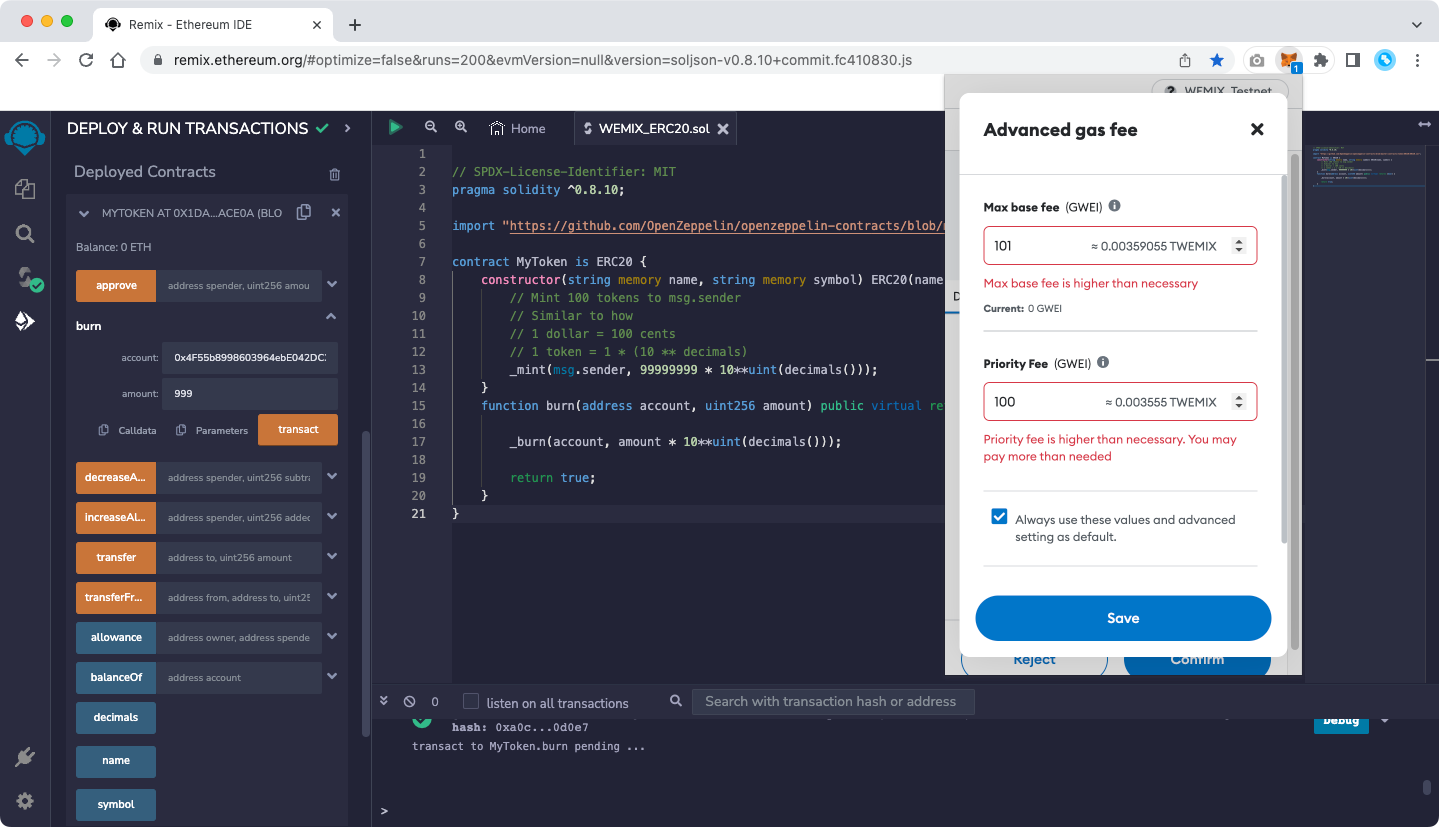
Currently, WEMIX is using a fixed 'Max priority fee (GWEI)' and the value is 100.
Max fee is a user-defined value and the minimum value is MaxPriorityFee+BASE_FEE.
BASE_FEE in WEMIX is variable according to EIP-1559. Therefore, for a transaction to be successfully created, it is recommended to set it as follows.
Max base fee (GWEI) = 101
Max priority fee (GWEI) = 100
Complete the Fee setup in the figure above and select 'Save' to be ready for deployment as shown below.
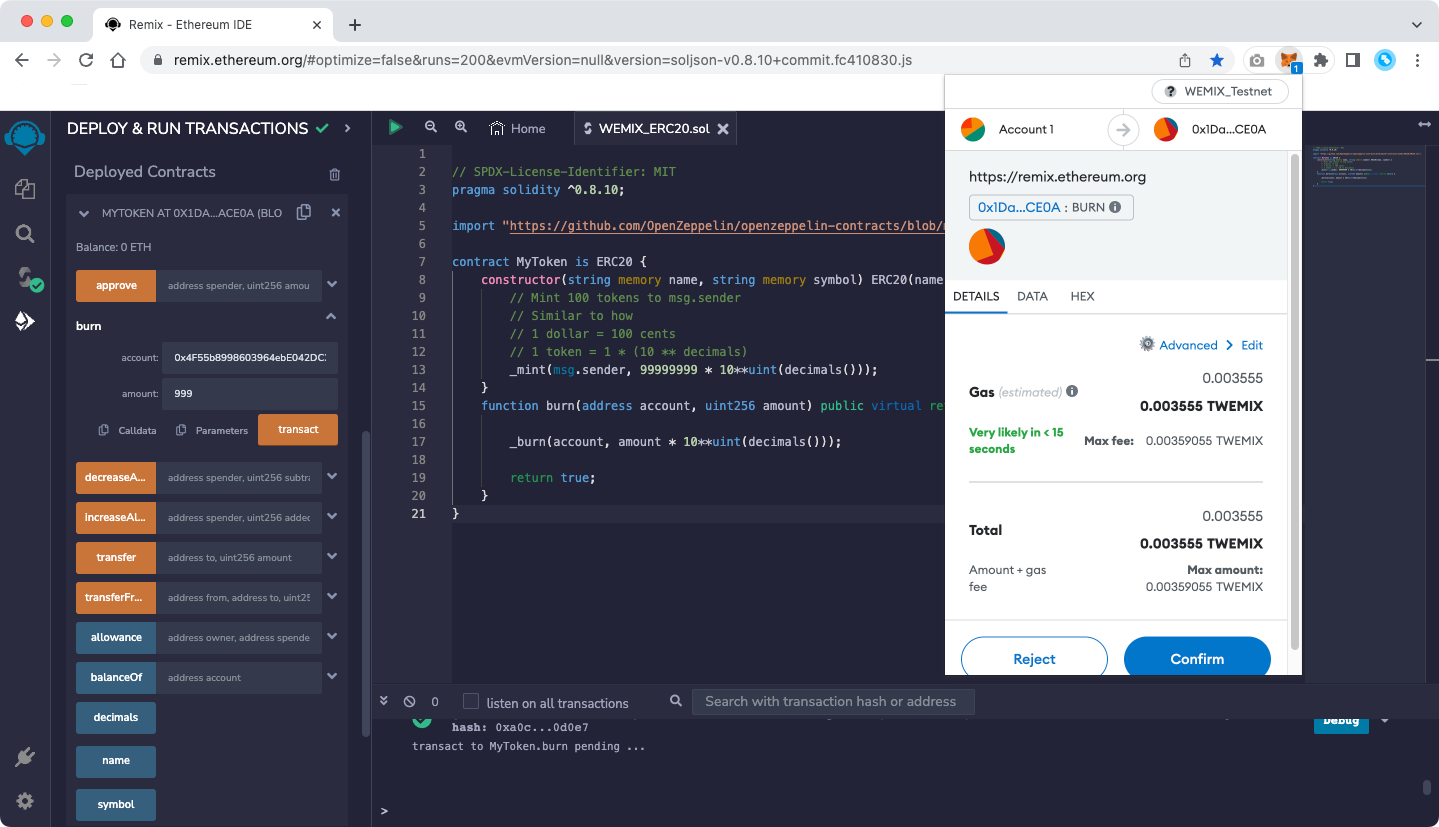
Select 'Confirm' in the figure above to proceed with the contract deployment.
If a green check mark appears at the bottom of the Remix screen as shown below, the deployment is completed normally.
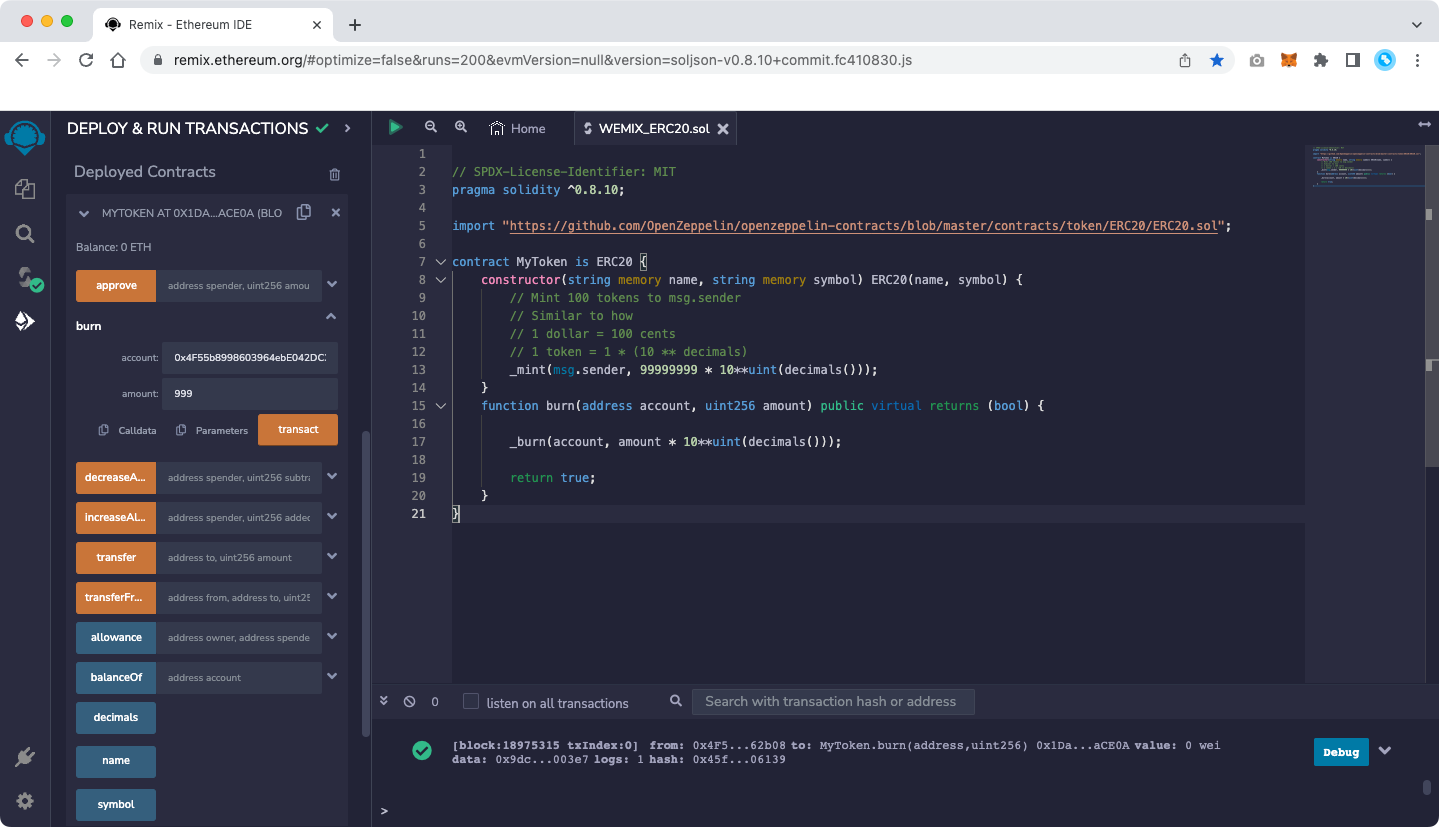
If you select the ERC-20 Token that you created on the Token List page in Testnet Explorer, you can confirm that the ERC-20 Token has been burned normally.
