> For the complete documentation index, see [llms.txt](https://docs.wemix.com/llms.txt). Markdown versions of documentation pages are available by appending `.md` to page URLs; this page is available as [Markdown](https://docs.wemix.com/en/tutorial/erc-20-token/send-erc-20-token.md).
# Send ERC-20 Token
You can send ERC-20 tokens deployed by using Remix from MetaMask.
You must have pre-registered ERC-20 tokens and the deployed ERC-20 token must be added in MetaMask.
* Deploy ERC-20 Contract Deployment : [Write ERC-20 Contract](/en/tutorial/erc-20-token/write-erc-20-contract.md)
* Add ERC-20 Token: : [ Check ERC-20 Token](/en/tutorial/erc-20-token/check-erc-20-token.md)
We will proceed with the process of sending the ERC-20 token in the order below\..
* Step 1 : Access MetaMask
* Step 2 : Send Token
* Step 3 : Confirm Token Transfer
{% hint style="info" %}
All examples are based on WEMIX3.0 Testnet.
{% endhint %}
## Step 1 : Access MetaMask
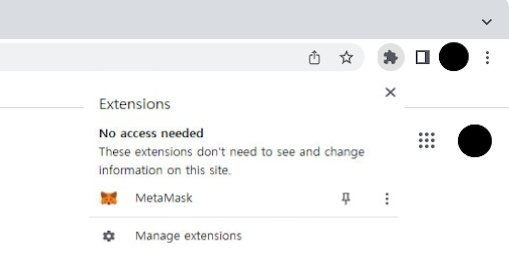
You must run the MetaMask Extensions that are installed. If you do not have MetaMask Extensions installed, you must go to the [Chrome Web Store](https://chrome.google.com/webstore/category/extensions) to download and run MetaMask.
Install MetaMask Extension
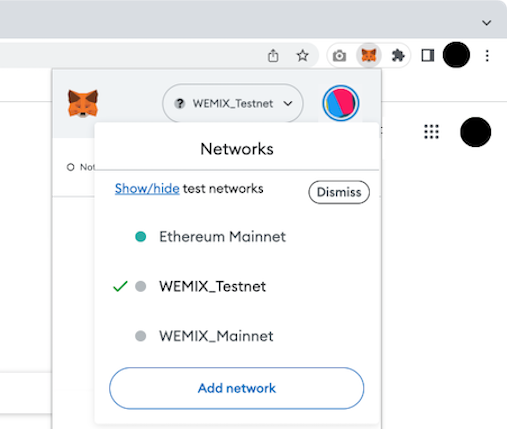
Once MetaMask is running, you can now change the network from Ethereum to WEMIX3.0 Testnet as shown in the picture below.
Connect WEMIX_Testnet
## Step 2 : Send Token
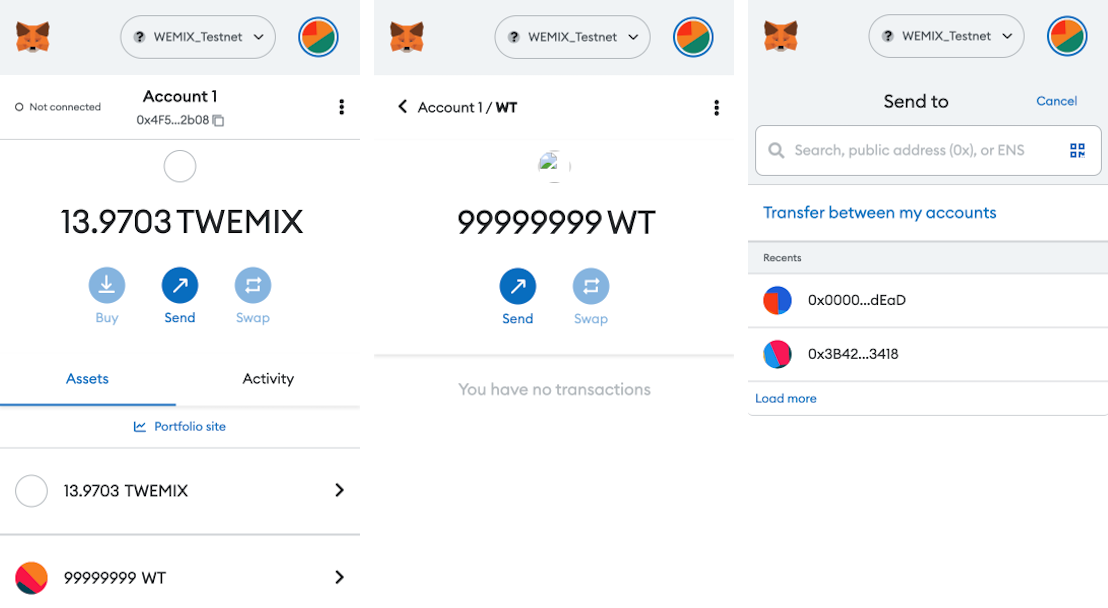
Select Custom Token that you have deployed and added.
Select 'Send' to display a screen to enter the wallet address to send.
Enter the wallet address of the person you want to send the token to.
Enter the Wallet Address
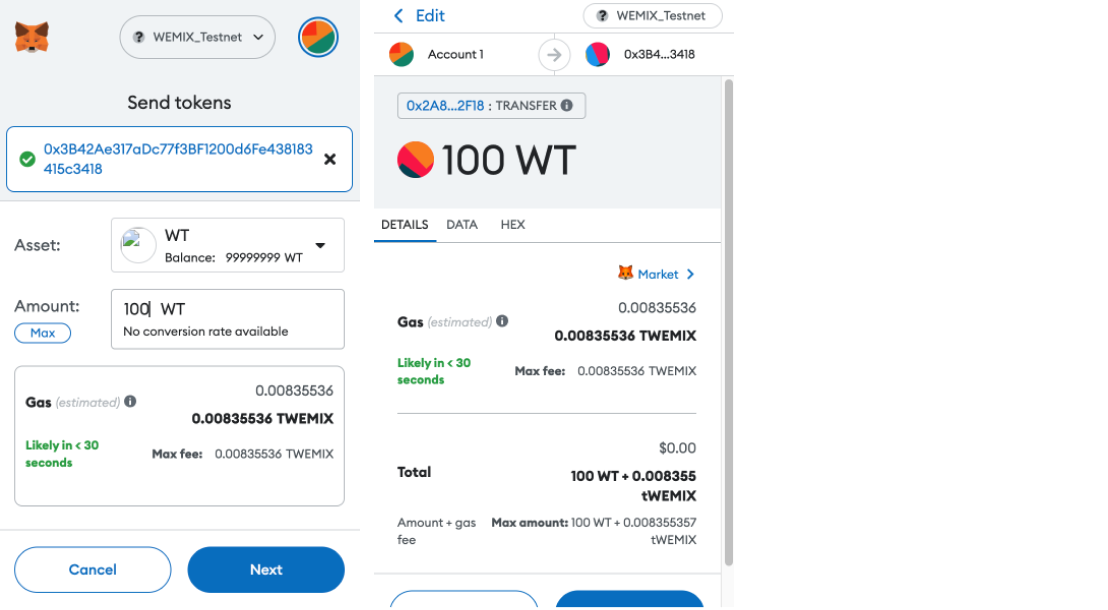
Once you enter your wallet address, make sure it's a token to send, enter the amount, and select 'Next'.
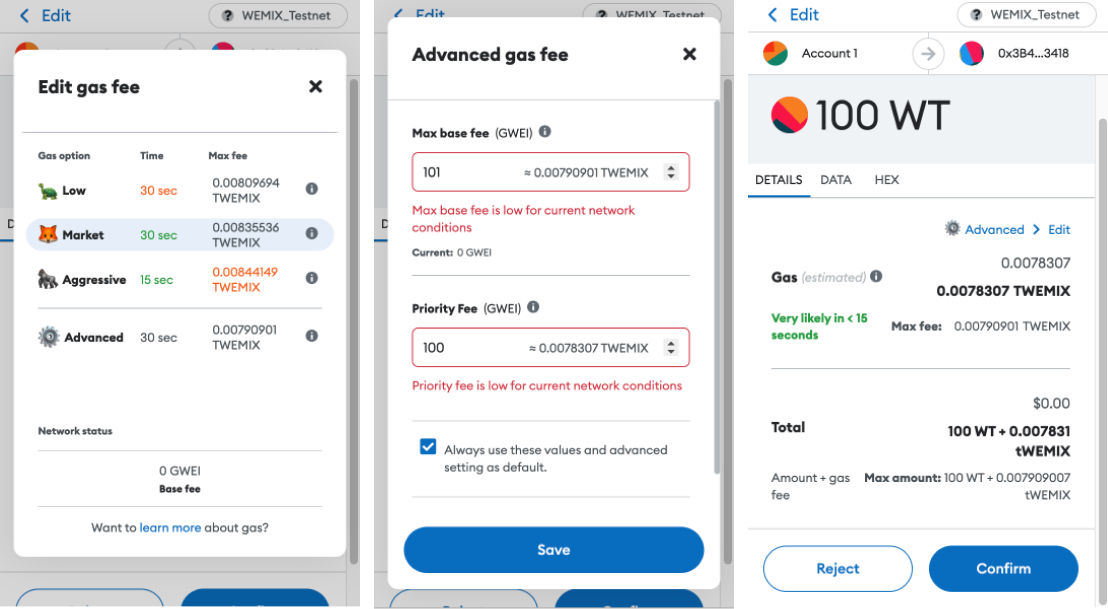
WEMIX has a different fee policy than Ethereum, so press the 'Site suggested' button to change t the Gas Fee.
Check Token Amount
Selecting 'Advanced' on the screen below allows the user to set 'Max priority fee (GWEI)' and 'Max fee (GWEI)' manually.
Set Gas Fee
Currently, WEMIX is using a fixed 'Max priority fee (GWEI)' and the value is 100.
Max fee is a user-defined value and the minimum value is MaxPriorityFee+BASE\_FEE.
BASE\_FEE in WEMIX is variable according to EIP-1559. Therefore, for a transaction to be successfully created, it is recommended to set it as follows.
1. Max base fee (GWEI) = 101
2. Max priority fee (GWEI) = 100
Check the check box to keep the value you changed.
Completing the Fee setup and selecting 'Save' as shown above, you are ready to send tokens. Token transfer is completed at 'Confirm' after final confirmation.
## Step 3 : Confirm Token Transfer
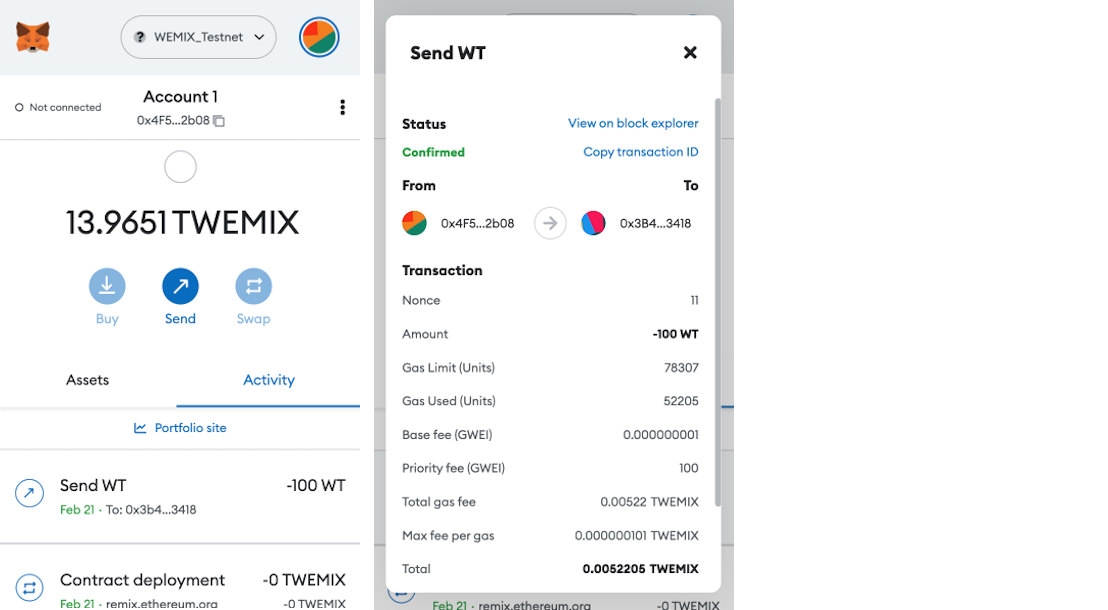
You can view the Send history on the 'Activity' tab of the MetaMask.
Select the Send history you sent to view more information.
Check Send Hisotry
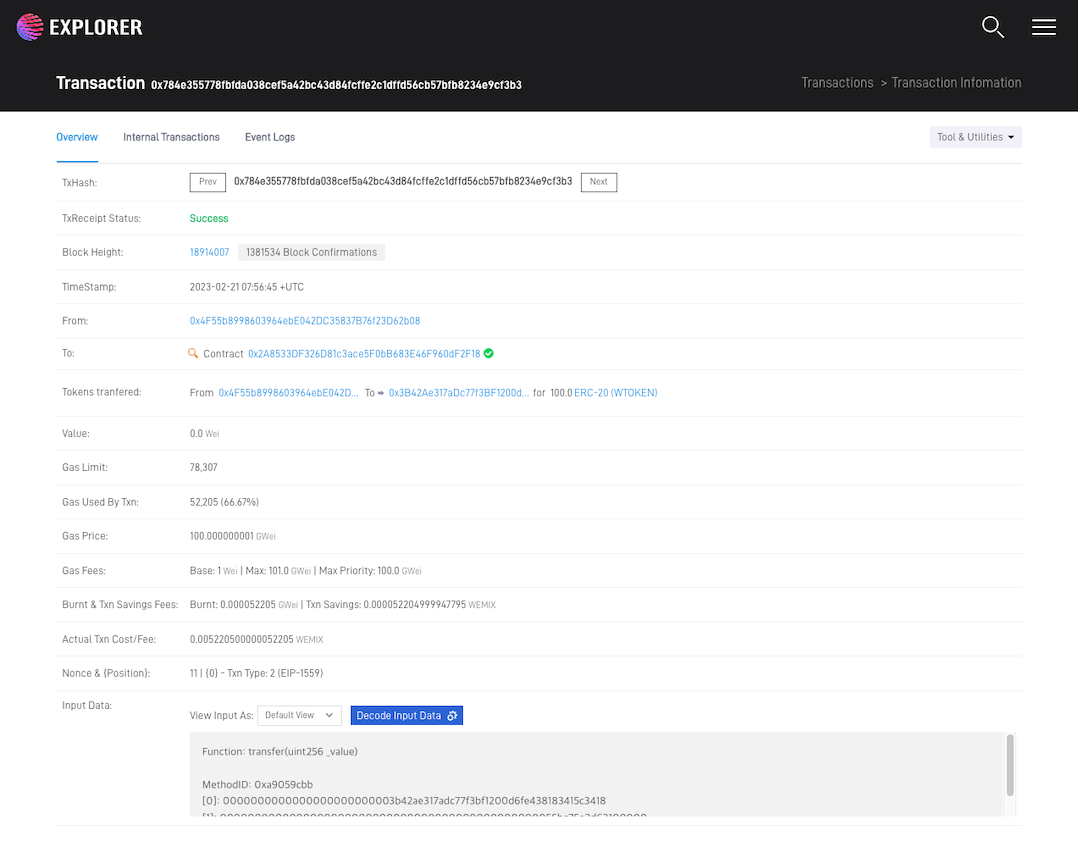
The Transaction ID also allows you to verify that the token has been sent in [Testnet Explorer](https://explorer.test.wemix.com/).
Access [Testnet Explorer](https://explorer.test.wemix.com/) and search for the Transaction ID.
Below is an example of what Testnet Explorer has seen.