
Use MetaMask
Creating a WEMIX3.0 wallet using MetaMask
MetaMask is a wallet for general users that can perform send/receive functions of coin, FT, and NFT on WEMIX3.0 Mainnet/Testnet. In addition, developers can connect REMIX IDE through MetaMask to distribute smart contracts and conduct behavior tests.
Let's proceed from installation to use in the following order.
Step 1: Install Metamask
Step 2: Launch Metamask
Step 3: Add WEMIX3.0 Network Information
Step 4: Send WEMIX Coin
Step 1 : Install MetaMask
Web users can download and install MetaMask from the Chrome Web Store and Mozilla add-ons, and mobile users can use the Apple App Store and Google Play Store.
Users go to the MetaMask's download page, select the platform they want, and follow the instrument's installation instructions.
The process is almost the same for all platforms, so in this section we will explain based on the MetaMask installed through the Chrome web store on Mac computers.

Step 2 : Launch MetaMask
If metamask is successfully installed, it will be visible in the extensions tab at the top right. If you click MetaMask in the picture below, you will be taken to the MetaMask start screen.
If MetaMask is successfully installed, it will be visible in the Extensions tab in the upper right corner. Pressing MetaMask in the figure below takes you to the MetaMask start screen.

Users who have previously created a wallet using MetaMask can select 'Import Wallet' and recover the wallet using the Secret Recovery Phase that they have backed up. On the other hand, new users press 'Create a Wallet'.
The following is based on the case where 'Create a Wallet' is selected.
First of all, you need to register 'Password' as shown in the picture below. The password is not stored on the server, but it is information that the user must remember, so please manage it carefully. Never store in a place that can be easily exposed.

Pressing 'Create' in the figure above creates 12 seed phrases (Secret Recovery Phrase). These 12 seed phrases are the 'secret key' of a wallet that stores multiple assets. Remember, this information should never be kept on devices connected to the Internet.
In the event of device theft, loss, or failure, the wallet and funds will be unrecoverable without the seed phrase. On the next page, confirm that you have 'written it down'.

Step 3 : Add WEMIX3.0 Network Information
If MetaMask is executed through the above procedure, you can see the screen below.
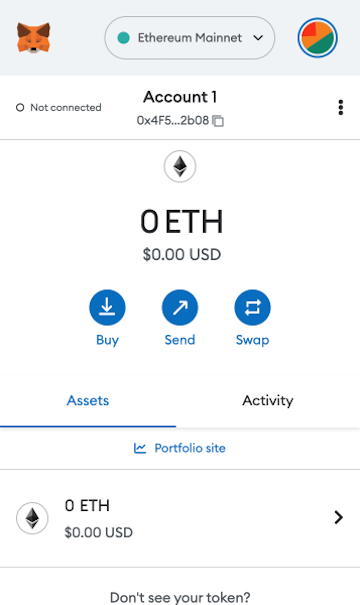
You can see that MetaMask basically supports Ethereum wallets. You cannot use it as a WEMIX wallet in these settings.
Now, let's change the network from Ethereum to WEMIX3.0 Mainnet/Testnet. In Settings, let's connect WEMIX3.0 blockchain node to the MetaMask wallet.
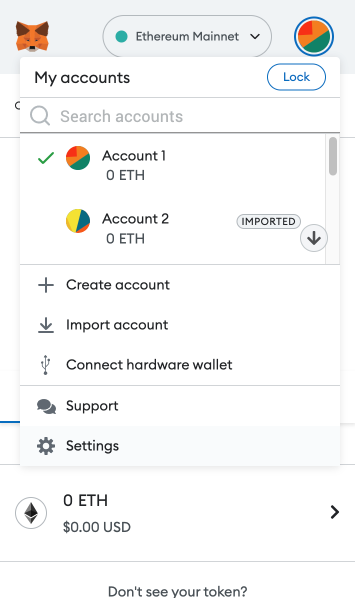
In the figure below, you will be moved to the 'Networks' menu on the Settings screen. Then click 'Add a Network' and manually add WEMIX3.0 Mainnet or Testnet.

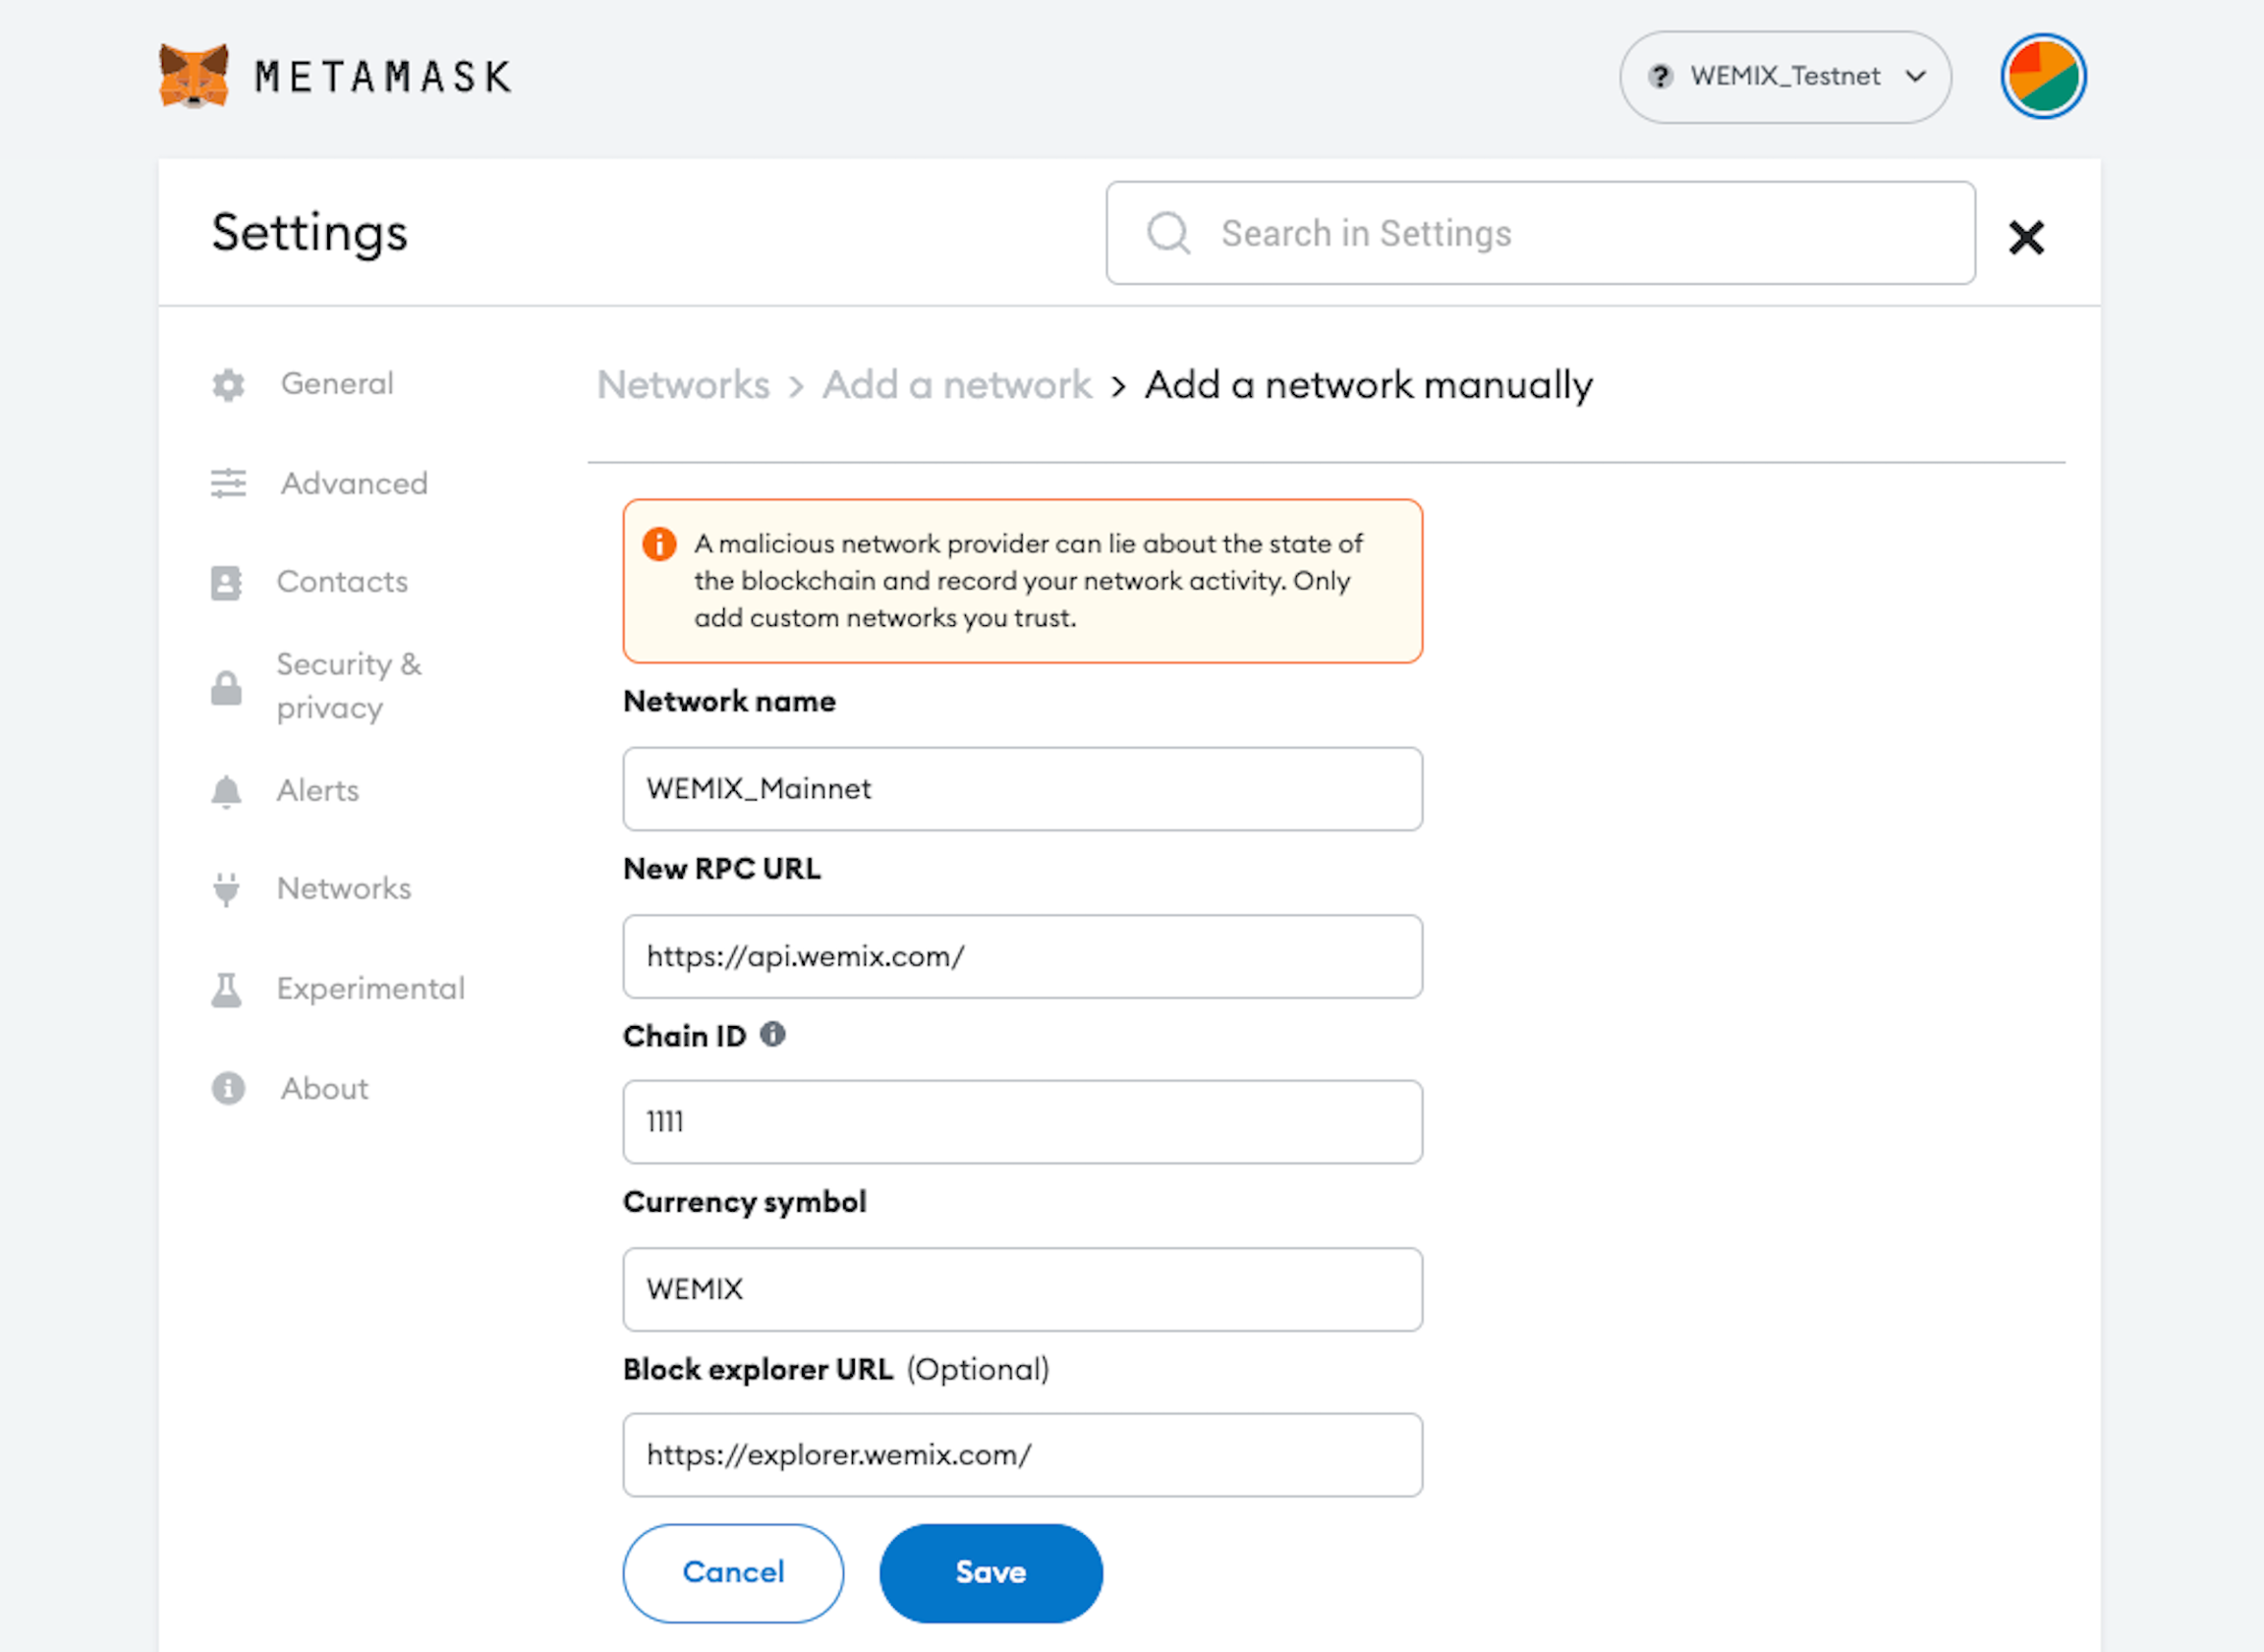
The following parameters must be entered for each network:
Testnet
Network Name: WEMIX_Testnet
New RPC URL: https://api.test.wemix.com/
ChainID: 1112
Symbol: tWEMIX
Block Explorer URL: https://explorer.test.wemix.com/
Mainnet
Network Name: WEMIX_Mainnet
New RPC URL: https://api.wemix.com/
ChainID: 1111
Symbol: WEMIX
Block Explorer URL: https://explorer.wemix.com/
To send WEMIX or TWEMIX using MetaMask, you can add both Mainnet and Testnet. When you save that network and return to the main screen, the network automatically changes to the information you enter and also the unit display is no longer ETH but WEMIX.
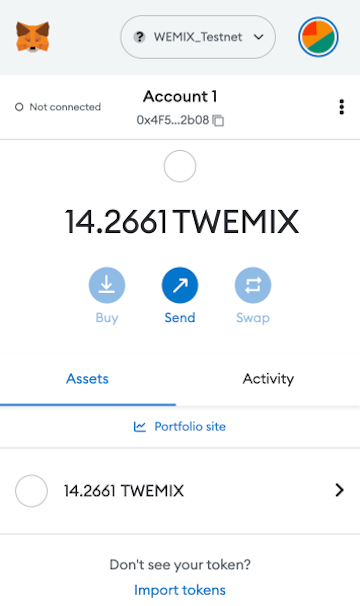
Step 4 : Send WEMIX coin
To send WEMIX coins, click the 'Send' button. Then, a window for entering the address you want to receive (Send to) appears.
Enter the address you want to receive and record the amount you want to send in the 'Amount' field.
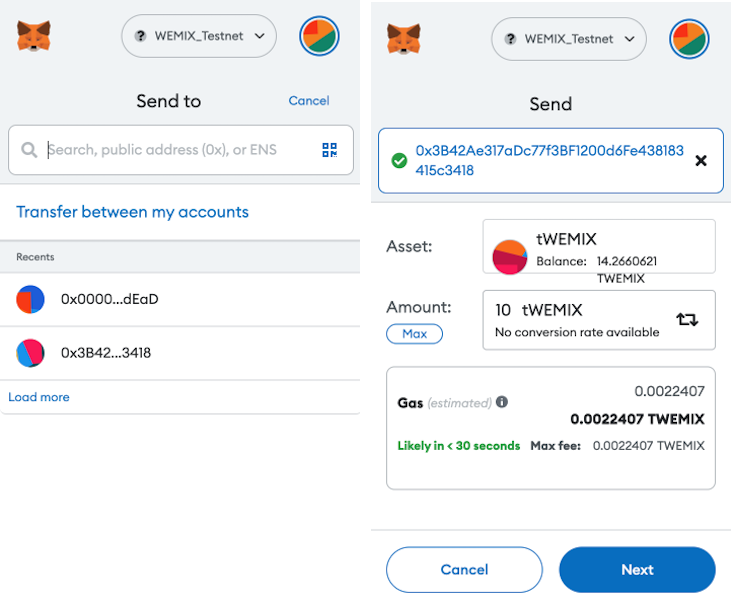
Enter the address and amount to receive and select 'Next', a screen showing 'Gas Fee' based on Ethereum will be displayed as shown below.
WEMIX has a different fee policy than Ethereum, so press the 'EDIT' button to go to the screen below.
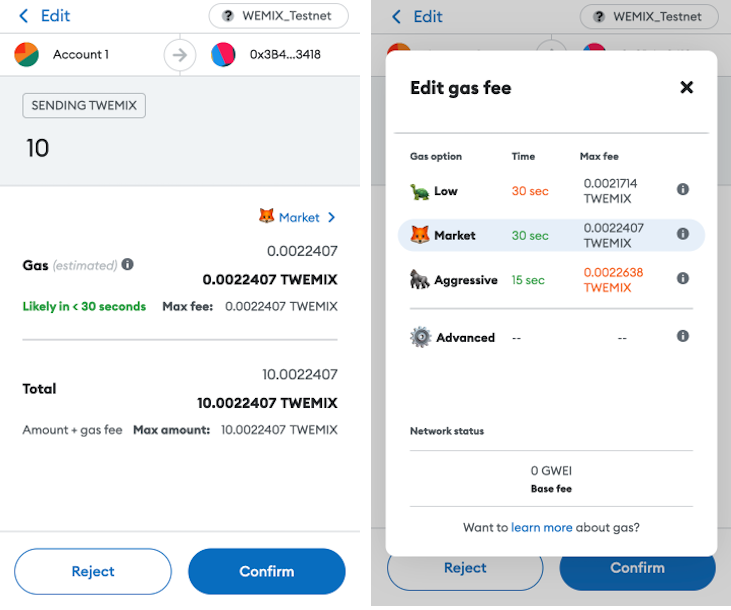
In the picture above, if 'Advanced Options' is selected, the user sets 'Max priority fee (GWEI)' and 'Max fee (GWEI)' manually.
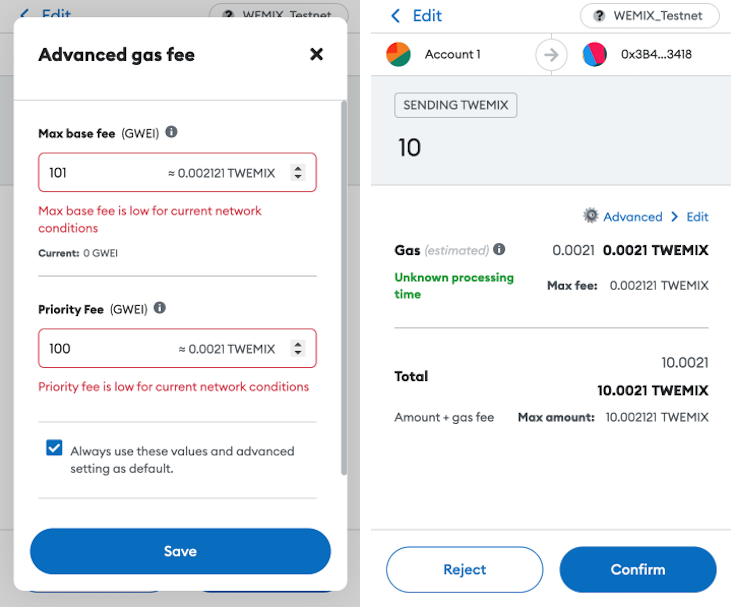
Currently, WEMIX is using a fixed 'Max priority fee (GWEI)' and the value is 100.
Max fee is a user-defined value and the minimum value is MaxPriorityFee+BASE_FEE.
BASE_FEE in WEMIX is variable according to EIP-1559. Therefore, for a transaction to be successfully created, it is recommended to set it as follows.
Max base fee (GWEI) = 101
Max priority fee (GWEI) = 100
Check the check box to keep the value you changed.
Complete the Fee setting in the figure above and select 'Save' to be ready for withdrawal.
Selecting 'Confirm' creates a 'Send WEMIX' transaction and once confirmed by WEMIX Block Producers, it is included in the block and the transfer is complete.